
The tech side |
| Why pinhole |
| Building a pinhole camera |
| Buying a pinhole camera |
| My cameras |
Galleries |
| Cardboard cylinder |
| Anamorphic cylinder |
| Matchbox |
| Film canister #1 |
| Film canister #2 |
| Solargraphs |
| Isolette |
| Hole-ga |
| 7-pinhole-Billy |
| Pizza box |
| Pinhole movies |
| Seymour 135B Matchbox camera: A4 size Letter size |
| About the photographer |
Building a pinhole camera, cont'd...6. Make the hole using a pin.Put the metal piece on a surface that is a little softer than the tabletop and works as protects the table while you work. Turn the pin gently, så that the pin punches a very small hole in the metal. 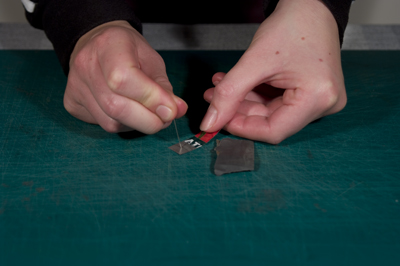
Turn the metal piece upside down. Sand off the little bump that appeared as you turned the pin through the metal. 
Then, fit the pin into the hole from the reverse side and gently twist/turn it. Repeat until the hole looks fairly circular and the metal is smooth and even. 7. Now it's time to measure the size of the pinhole.A slide scanner is a very good help when measuring the pinhole size. If you scan the pinhole at very high resolution it is possible to measure the size of the hole quite accurately, for instance in Photoshop. The scan then looks like this: 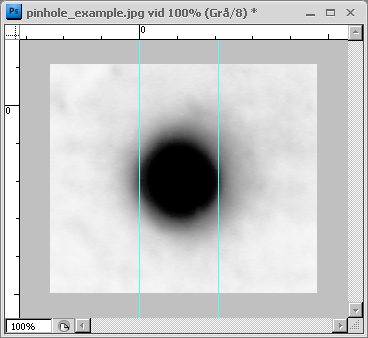
I scanned the pinhole at 9,600 dpi and then, as you can see, it is possible to get a good view of the pinhole's shape and size. In this case the hole is a little more than 0.2mm. Since I will need a hole almost twice as big for my tea box camera, I will have to drill and sand some more to get the right size of pinhole. ................................................................................................... |
Links |
| Interesting reads... |
| Pinholeday |
| Zero Image |
| Pinhole resource |
| Peter Wiklund |
| f295 |
| Solargraphy! |
| Dirkon |
| Maco Direct |
| Lumiere Shop |
| Fotoimpex Berlin |
|
|
| |
| Lena Källberg Photography |